

The Art of Gift Wrapping: Making Christmas Presents Shine
The holiday season will soon be upon us. It’s often one of the best times of the year for families, and it’s the time when you can show your loved ones that you care. Of course, this means spending time with them. But, one of the most delightful aspects of Christmas is the act of giving. And what better way to make your loved ones feel special than by wrapping your gifts with care and creativity?
It can seem daunting if you’re not used to taking on the responsibility of Christmas gift wrapping. This is particularly true if you’re not used to wrapping anything. This guide is going to coach you through what you need and how you’re going to start wrapping gifts.
Gather Your Supplies
Before you embark on your gift-wrapping journey, ensure you have all the necessary supplies. Here is what you’re going to need to get started.
Wrapping Paper: Choose a quality wrapping paper that suits the recipient’s taste and the theme you want to convey. The options are endless, whether it’s classic red and green or something more unique. You can shop at Viola Grace to see different designs and select one you love for the festive season.
Scissors: Invest in a good pair of scissors designed for cutting paper. Sharp scissors will make your job much easier. Everything will be quicker to cut, which means that you can get through wrapping gifts in no time.
Tape: Clear tape is your best friend in gift wrapping. It’s practically invisible and gives your packages a polished look. While it can cost slightly more, it’s always a better investment. In addition, it’s beneficial to choose tape that is easy to cut without scissors.
Gift Tags: Personalize your gifts with festive gift tags or make your own by repurposing old holiday cards. Don’t forget that this is where you’re going to write a message. So, ensure that it’ll be big enough to write what you want to say.
Ribbons and Bows: Add an extra layer of elegance with colorful ribbons and bows. Some of them have a sticky side, and you just press them down. Others might have to be attached with tape.
Tissue Paper: Use tissue paper to protect delicate items or add a touch of sophistication to your gift. It can also be a good alternative if you have difficult shapes to wrap. You can grab a gift bag and use the tissue to cover the gift rather than wrapping it up.
Step-by-Step Guide to Gift Wrapping
Do you need some help with gift wrapping? Of course, you want to make a good impression. But, you have to do this neatly. So, here are some steps you need to take.
1. Measure and Cut
Lay out your wrapping paper on a flat surface and place the gift in the center. Measure enough paper to cover the gift entirely, leaving a few extra inches on each side. This excess will ensure your gift is fully covered when folded. Many people are attempted to use as minimal paper as possible. But, if you guess, you can be left with not enough paper to cover the gift. Don’t skip this step.
2. Fold and Secure
Fold the paper over the gift, making sure it overlaps slightly. Use clear tape to secure the paper in place, paying extra attention to the corners for a neat finish. If your gift has an irregular shape, consider using a box to simplify the process. Then, this is going to be able to cover with paper.
3. Create Neat Edges
To create clean edges, fold in the sides of the paper like you’re wrapping a burrito. Make a crease along the edge of the gift and secure it with tape. It can help to pre-cut your tape and have them ready. This way, you can fold with one hand and grab the tape with the other.
4. Add Ribbons and Bows
Now comes the fun part – decorating your gift! Cut a piece of ribbon long enough to wrap around the gift and tie a bow. You can also attach a pre-made bow for an extra touch of elegance. It’s best to choose a color that complements the paper you’re using.
5. Don’t Forget the Gift Tag
Attach a gift tag to your ribbon or directly onto the gift. Write a heartfelt message or simply label it with the recipient’s name. Either way, they’re going to know that they’re cared about and that the gift is for them.
6. Finishing Touches
For an added flair, curl the ends of the ribbon using the edge of your scissors. It’s a small detail that can make a big difference in the presentation. Indeed, it can impress the recipient of the gift. Simply drag the scissors along the ribbon, and this is going to make it curly.
Creative Gift Wrapping Ideas
If you’re feeling adventurous and want to do something different, consider these creative gift-wrapping ideas:
Fabric Wrapping: Use a beautiful piece of fabric to wrap your gift for an eco-friendly, reusable option. If the recipient is something that’s environmentally conscious, they’re going to love the fact you’ve been resourceful. Just make sure that the fabric looks good and doesn’t look used.
Newspaper or Maps: Upcycle old newspapers or maps for a unique and personalized touch. People will love to look at the headlines and images on the wrapping before they open the gift.
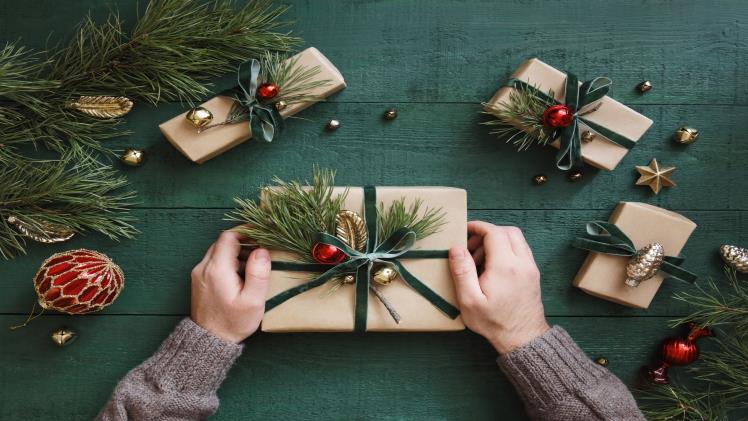
Embellishments: Add ornaments, pine cones, or even a sprig of fresh greenery to your gift for a rustic and festive look. This is particularly true at Christmas when everything is so happy and about the holidays around you.
Custom Stamps: Create custom stamps with holiday designs or the recipient’s name for a personalized touch. Remember that Christmas is about having fun and doing something different.
Double Wrapping: Wrap your gift in two layers of paper with different colors or patterns for an eye-catching effect. It’s all about showing the recipient that you’ve put a lot of thought and effort into their gift.
Conclusion
Gift wrapping is an art that allows you to express your love and thoughtfulness during the holiday season. With a little practice and some creativity, you can turn your Christmas presents into works of art that will delight your friends and family. So, gather your supplies, follow these steps, and let your gift-wrapping skills shine this holiday season.


